You have been instructed or invited by your manager to user Worksnaps to track time. You wonder what you need to do next. Here is a brief description on how you can get started.
1. If you have received an invitation email, use the link in the invitation email to create an Worksnaps account and join the project that your manage invited you into.
Here is a sample of the invitation email.

You can simply click the link in the email, then you will be brought to Worksnaps page that looks like the following.

You can simply filled in the information and click the "Sign Up" button. Next, you will be asked to confirm to join the project that you are invited into.
If you already have a Worksnaps account, you can click on the "Sign In" link in the yellow message box to sign in instead of registering for a new account.

You just need to click "Confirm" button to join the project. Then you will be brought to the Dashboard page.

You don't need to care about the Dashboard for now. This is the place you can see your logged time. You will use it later and let's not get into the details now. Just go ahead to next step to download Worksnaps client and start logging time.
2. Download and Install Worksnaps Client.
The reason that you manager invited you into a project on Worksnaps is likely that he wants you to log time. What you need to do next is download and install Worksnaps Client. Here is how you do it.
Go to Worksnaps Client Download page (http://www.worksnaps.net/www/download.shtml).

Choose the operating system you use (Windows, MAC or Linux), use the respective link to download the client. The installation is pretty straight forward and works like most other programs. There are instructions for Linux and MAC that you might want to look at. For Windows, it is simply to execute the downloaded file.
3. Start to use your Worksnaps Client.
Once you install Worksnaps Client program, you can start it. Here is what you will see and do after starting Worksnaps Client.
You will first see the login dialog. Here you just need to type in the credentials you created during the Sign Up process in Step 1.

Once you log in, you will see a dialog that let you select a project to log time to. Just pick the project that you want to work on and log time to. Click "OK" button.

Then you will be prompt to select a task in the project to log time to. Just select a task and click "Start" button.

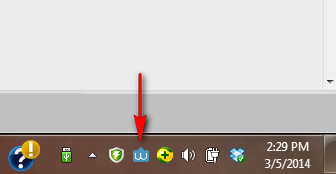
Now Worksnaps Client will start logging your time and computer activity (including screens shots, mouse/keyboard volume and active applications) and report it to the server. Your manager will be able to see the time and computer activity you have logged. To access Worksnaps Client, you can find the Worksnaps icon in your task tray. Right click on it to bring up a menu that you can perform various operations.

to view an animated illustration on starting Worksnaps Client
For more information, here are some Frequently Asked Questions from contractor point of view.